
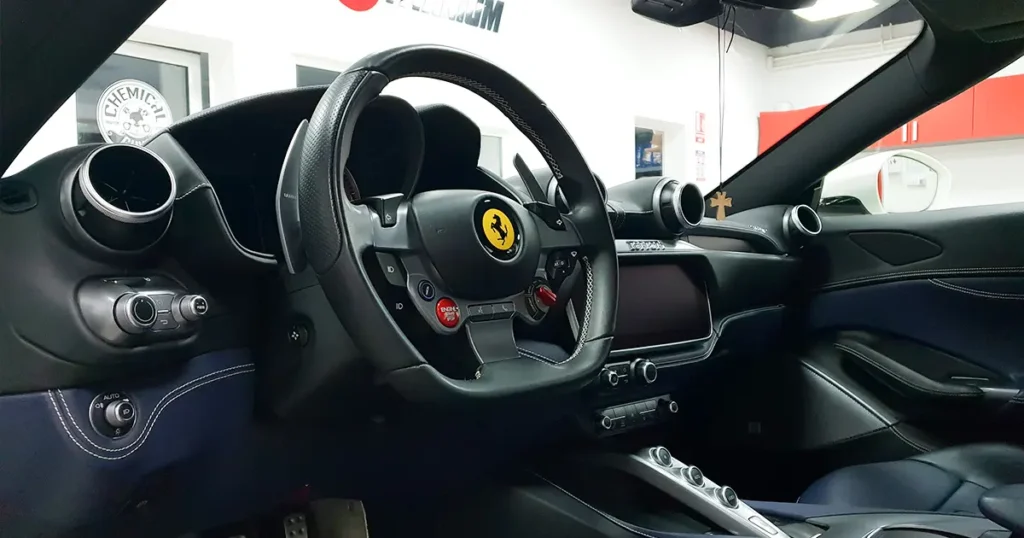

Welcome to the DetailingDojo.com guide to car interior detailing. If you have ever looked at your dashboard and seen a layer of “shiny” grease or struggled with a coffee stain on your driver’s seat, you are in the right place. Most beginners think detailing is just a “fancy car wash,” but it is actually a global movement focused on transformation and preservation. A freshly detailed car doesn’t just look better; it feels better and preserves the vehicle’s resale value—cleaner cars sell faster and for higher prices.
The biggest mistake beginners make is focusing on “shining” surfaces rather than cleaning them. Dirt doesn’t disappear just because you wiped it with a wet rag; you have to extract it. Another common pitfall is using too much water on delicate areas like the roof lining, which can cause the glue to fail and the fabric to sag. In this guide, I am going to share the professional systems used in high-end shops to help you achieve a factory-matte finish without damaging your investment.
What Tools and Chemicals You Need
You don’t need a massive warehouse to start, but you do need the right chemistry and mechanical tools. Professional results come from understanding how materials interact.
Essential Chemicals:
- APC (All-Purpose Cleaner): This is your workhorse. Ideally, look for one that is pH neutral and leaves no residue or strong scent.
- Fabric Cleaner / Stain Remover: Specifically formulated to penetrate and lift organic grime from cloth fibers.
- Leather Cleaner: Leather is delicate. Use a dedicated pH-neutral cleaner to avoid decoloring or drying out the material.
- Glass Cleaner: Use an alcohol-based formula for a streak-free finish.
- Degreaser: For heavy organic grime like food spills (always rinse with water after use).
- Adhesive Remover: Great for removing stickers or gum, but keep this far away from plastics and leather as it can cause permanent damage.
Necessary Tools:
- Microfiber Towels: You need 12 to 24 towels (16×16 inch) per car.
- Brushes: One soft bristle square brush (for leather/plastic) and one hard bristle brush (for floors/trunk).
- Vacuum Cleaner: One that can handle water extraction is a game-changer for seats.
- Spray Bottles: For diluting your concentrated chemicals.
- LED Lamp: You cannot clean what you cannot see. Lighting is essential for spotting streaks on glass or dust in crevices.
Step-by-Step Interior Detailing Process
To clean like a pro, you must work systematically. We use a top-to-bottom approach to ensure that gravity doesn’t pull dust onto a surface you’ve already cleaned.
Phase 1: Floor Mats and Seatbelts
Start here because these need the most drying time.
- Floor Mats: Take them out. Use a hard brush and APC to break up dirt, then rinse them with a pressure washer (keep the nozzle 10 inches away to avoid damage).
- Seatbelts: Pull them all the way out and close the door on the base to keep them outside the car. Spray with APC, brush, and pressure wash. They are thick synthetic fabric and need that high-pressure rinse to truly extract grime.
Phase 2: The Roof Lining (Headliner)
This is the most delicate part of how to clean car interior.
- The “Mitt” Method: Never spray liquid directly on the headliner. Spray APC on a clean microfiber, place it over the back of your hand like a mitt, and gently rub in linear motions.
- DO: Use light-colored towels so you can see the dirt being extracted.
- DON’T: Use an extractor or a brush here. The glue is weak, and too much moisture or friction will make the headliner fall.
Phase 3: Dashboard and Door Panels
Divide the dashboard into three sections: driver side, center console, and passenger side.
- Vents and Buttons: Use small round brushes to “flick” dust out of vents. Wipe the brush on a dry towel after every pass.
- Door Panels: Follow the same logic—top to bottom. Lower the windows slightly to clean the “wind net” and seals where insects and dust hide.
Phase 4: Seats and Floors
This is where you’ll spend the most time.
- Seats: Vacuum the joints and seams first. For fabric, spray your cleaner and use a soft brush to agitate. If you have an extractor, pull the liquid out in slow, steady passes—like you are “petting a pet”.
- Floors: Move the seats all the way back to reach the rails. Use a hard brush to pull hair and debris out of the synthetic fibers before vacuuming.
How to Clean Different Materials
Different surfaces require different “abrasion vs. lubrication” strategies.
Leather
How to clean car interior surfaces made of leather requires a gentle touch. Real leather (and even high-quality “eco-leather”) has pores that trap oils.
- The Goal: A soft, matte finish. If the leather is shiny, it’s dirty.
- Technique: Apply leather cleaner to a microfiber or soft brush. Gently agitate the seams (stitches) as they collect the most grime.
- Pro Tip: Do the “wrinkle test”—push your finger into the material. If it wrinkles like skin, it’s likely real coated leather and needs extra hydration with a conditioner afterward.
Fabric
When learning how to remove stains from car seats, remember that “less is more.”
- Technique: Don’t soak the seat. Most dirt is in the top layer. Wiping with a dampened chemical towel first can remove 80% of the grime without making the cushion a soggy mess.
- DO: Use linear (straight) motions only. Circular motions can damage fabric fibers.
Plastics and Piano Black
These scratch easily. Use your softest brushes and plenty of chemical lubrication to prevent “dry” friction.
Common Mistakes to Avoid
- Circular Scrubbing: Professionals always work in linear motions (up-down or left-right). Circular motions are inconsistent and can leave visible “swirl” patterns.
- The “8-Side” Towel Rule: Never use a crumpled towel. Fold your microfiber in half twice to create eight clean sides. Once one side is dirty, flip to a fresh one. Otherwise, you’re just smearing dirt.
- Direct Spraying on Electronics: Never spray cleaners directly onto navigation screens or buttons. Spray the towel first to avoid short-circuiting expensive components.
- Neglecting the Drying Process: A clean car that stays wet will grow mold or smell like a “wet dog.” Let the car idle with the heater on and windows cracked 1cm to pull fresh air through and dry the cushions.
How Long Does It Take?
For a beginner working on a medium-sized car in average condition, expect a full car interior detailing session to take between 2.5 and 3 hours. This includes the roof lining, dashboard, door panels, seats, and floors. If the car is neglected or has heavy pet hair, it could easily take 4+ hours.
DO: Set a time limit for each section. If you don’t, you might spend 7 hours on an engine bay and still see a speck of dust.
Conclusion
Car interior detailing is a blend of science and patience. By following the top-to-bottom workflow, using linear motions, and respecting the delicacy of materials like leather and headliners, you can transform a daily driver into a pristine sanctuary. Remember, the key is to extract dirt, not just move it around. Use your LED lamp to check your work, and always prioritize safety by wearing gloves and masks when working with strong chemicals.
If you’ve enjoyed these car interior cleaning tips and want to take your skills to a professional level—perhaps even starting your own shop—check out our Interior Detailing Course on Udemy. We dive deep into advanced extraction, leather restoration, and the business strategies you need to turn this passion into a career. Keep it clean!